
During this week 3 D Printing and scanning was the topic of discussion
3 D Printing:-
The 3D printing process builds a three-dimensional object from a computer-aided design (CAD) model,
usually by successively adding material layer by layer, which is why it is also called additive manufacturing, unlike conventional machining,
casting and forging processes, where material is removed from a stock item (subtractive manufacturing) or poured into a mold and shaped by means of dies, presses and hammers.
The term "3D printing" covers a variety of processes in which material is joined or solidified under computer control to create a three-dimensional object,
with material being added together (such as liquid molecules or powder grains being fused together), typically layer by layer. In the 1990s,
3D-printing techniques were considered suitable only for the production of functional or aesthetic prototypes and a more appropriate term for it was rapid prototyping.
3 D Scanning:-
D scanning is the process of analyzing a real-world object or environment to collect data on its shape and possibly its appearance (e.g. colour). The collected data can then be used to construct digital 3D models.
A 3D scanner can be based on many different technologies, each with its own limitations, advantages and costs. Many limitations in the kind of objects that can be digitised are still present. for example, optical technology may encounter many difficulties with shiny, reflective or transparent objects. For example, industrial computed tomography scanning and structured-light 3D scanners can be used to construct digital 3D models, without destructive testing.
Individual Assignment-1- 3D Printing and designing
As a part of the individual assignment, Designing and printing of a small object was required to be done which cannot be done by substractive method.
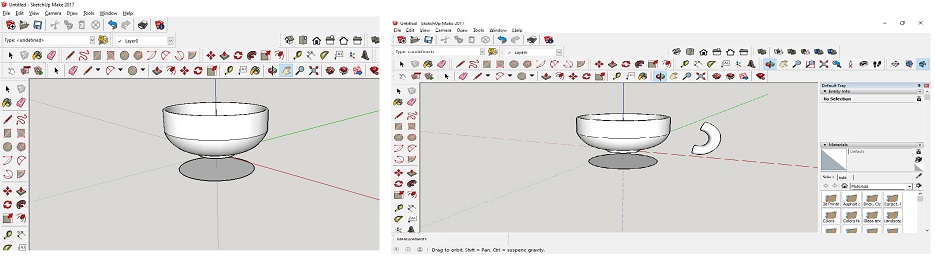
For this purpose I had selected to print a Cup and Sauser set by designing the same and 3D printing it through Sindoh. The software I used for the purpose was Sketchup. This software has very good graphics and many tools for the ease of designing. I initially found it very difficult to work with but through some videos available on youtude I was able to understand the tools and its usage. Credit to the videos has been updated in my Credit Page.
The images of my sketch-up during design are shown below:-
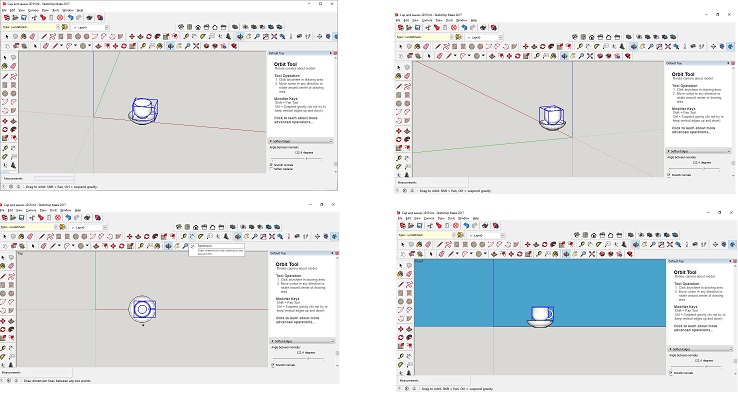
After designing was complete the image of the object from various angles was as under:-
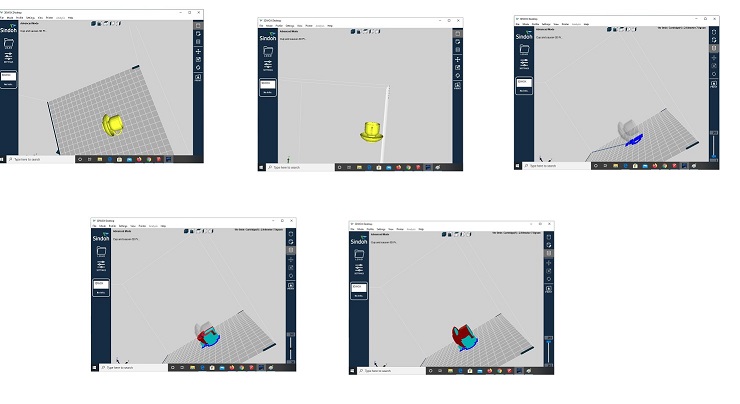
Further, the design was saved in .obj format and then uploaded in software of 3D printer which is 3DWOX in our case. After uploading the image, there are various option of increasing and decresing the dimensions, orientation of print etc. I decreased the size of my design so that the printer may print it quickly and less material is used. Further I view the formation of base and the layers in my design and then calculated it for savin it in G-Code. G-Code is the language by which the printer understands the inputs and converts the inputs into a desired output. The images of my work in 3DWOX software is shown in the images below:-
The saved G-code was then printed using Sindoh- 3DWOX printer and the pictures during the printing process was as shown below:-
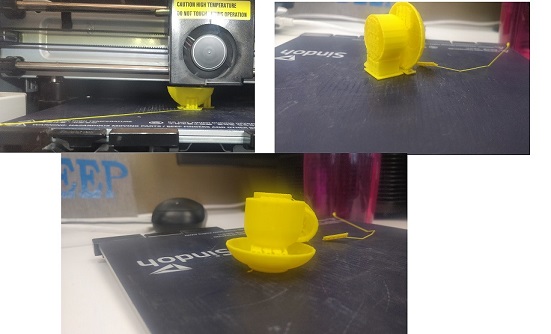
The final Product which I received after 3D printing was as under:-

Individual Assignment-2- 3D Scanning:-
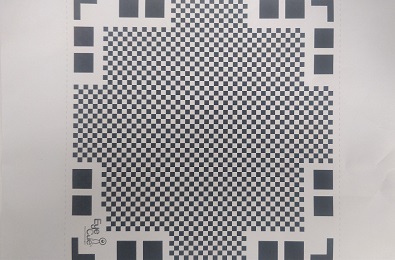
For 3D scanning, I have used a mobile application called Qlone. The app is very user friendly and easy to use. The main requirement of the app is that it would scan the object placed only on AR Mat. This mat is easily available along with the Qlone app and can be printed on a simple A-4 size paper. The image of the AR mat required for Qlone app is shown below:-
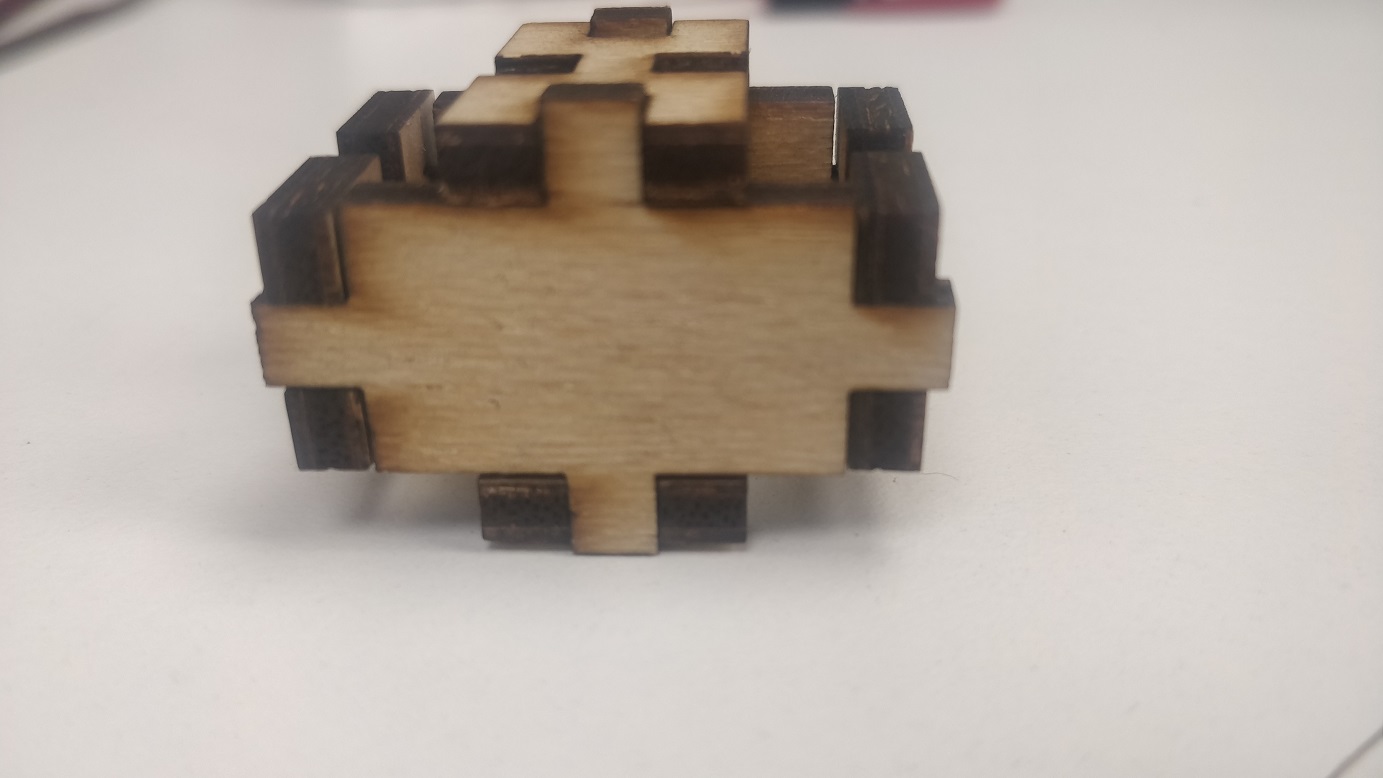
Further, I scanned the image of a pressfit kit constructed as per the assignment. The original image of the Pressfit kit was as under:-
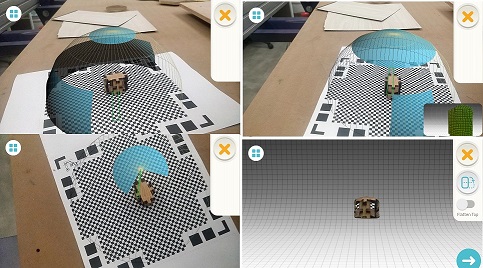
I used Qlone mobile app after that and the images during the scanning process are shown below:-
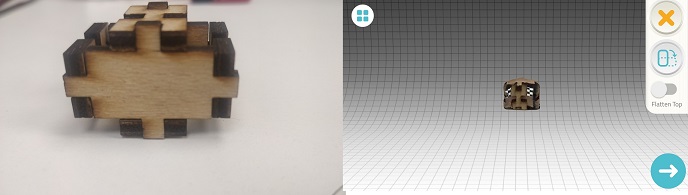
The final scan which I got after the entire scanning process is shown below. The picture below shows the actual object and 3D scanned object:-
The scan result obtained was more or less good but not as good as expected. Hence, I didn't print the object and have just learnt about the process of 3D scanning.